
English documentation — We currently provide our documentation only in English. This helps us keep the information as accurate and up-to-date as possible during the rapid development of the API.
API
Getting started
From zero to your first streaming response in five minutes.
This walkthrough takes you from a fresh account to a working response in under five minutes. We will issue an API key, send a single message, and stream the answer.
1. Create an account#
Sign up at chat.eugpt.ai. The free trial gives you enough headroom to develop and test integrations end-to-end. No credit card is required for the trial.
2. Issue an API key#
-
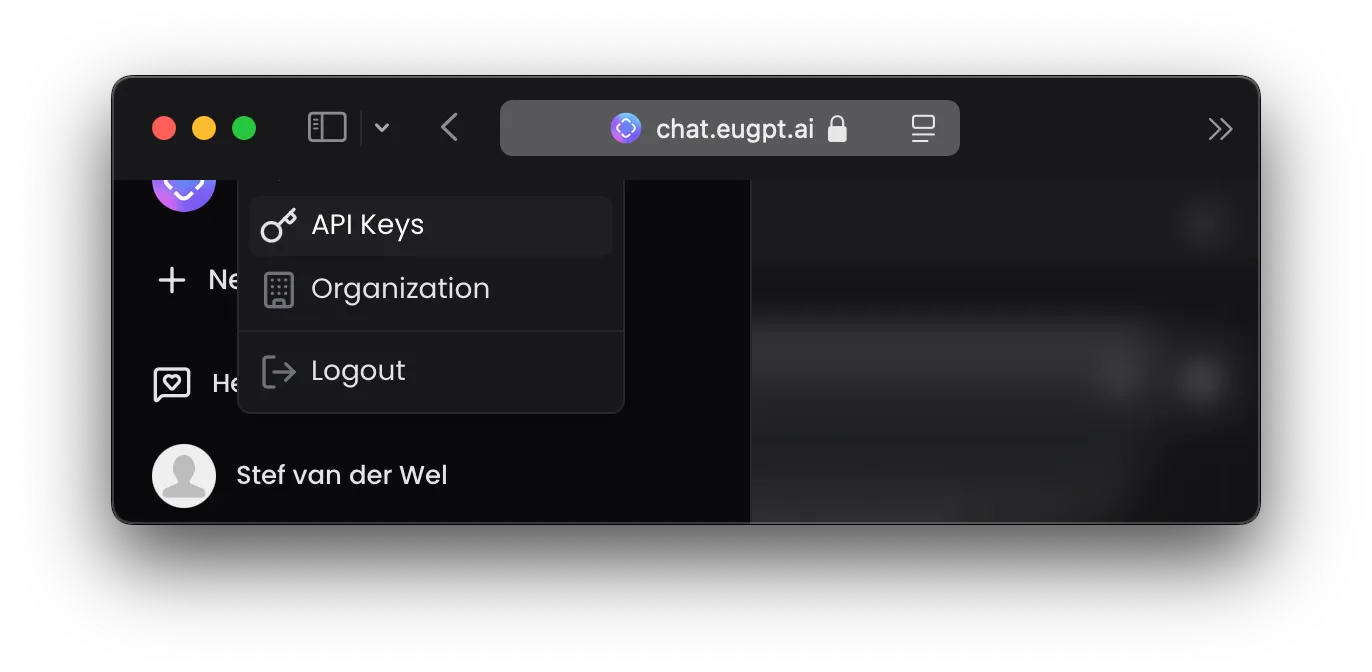
Open the chat UI and click your avatar in the bottom-left.
-
Go to Settings → API Keys.
-
Click Create key, give it a label that tells you where it will run (e.g.
local-dev,staging-job), and copy the value.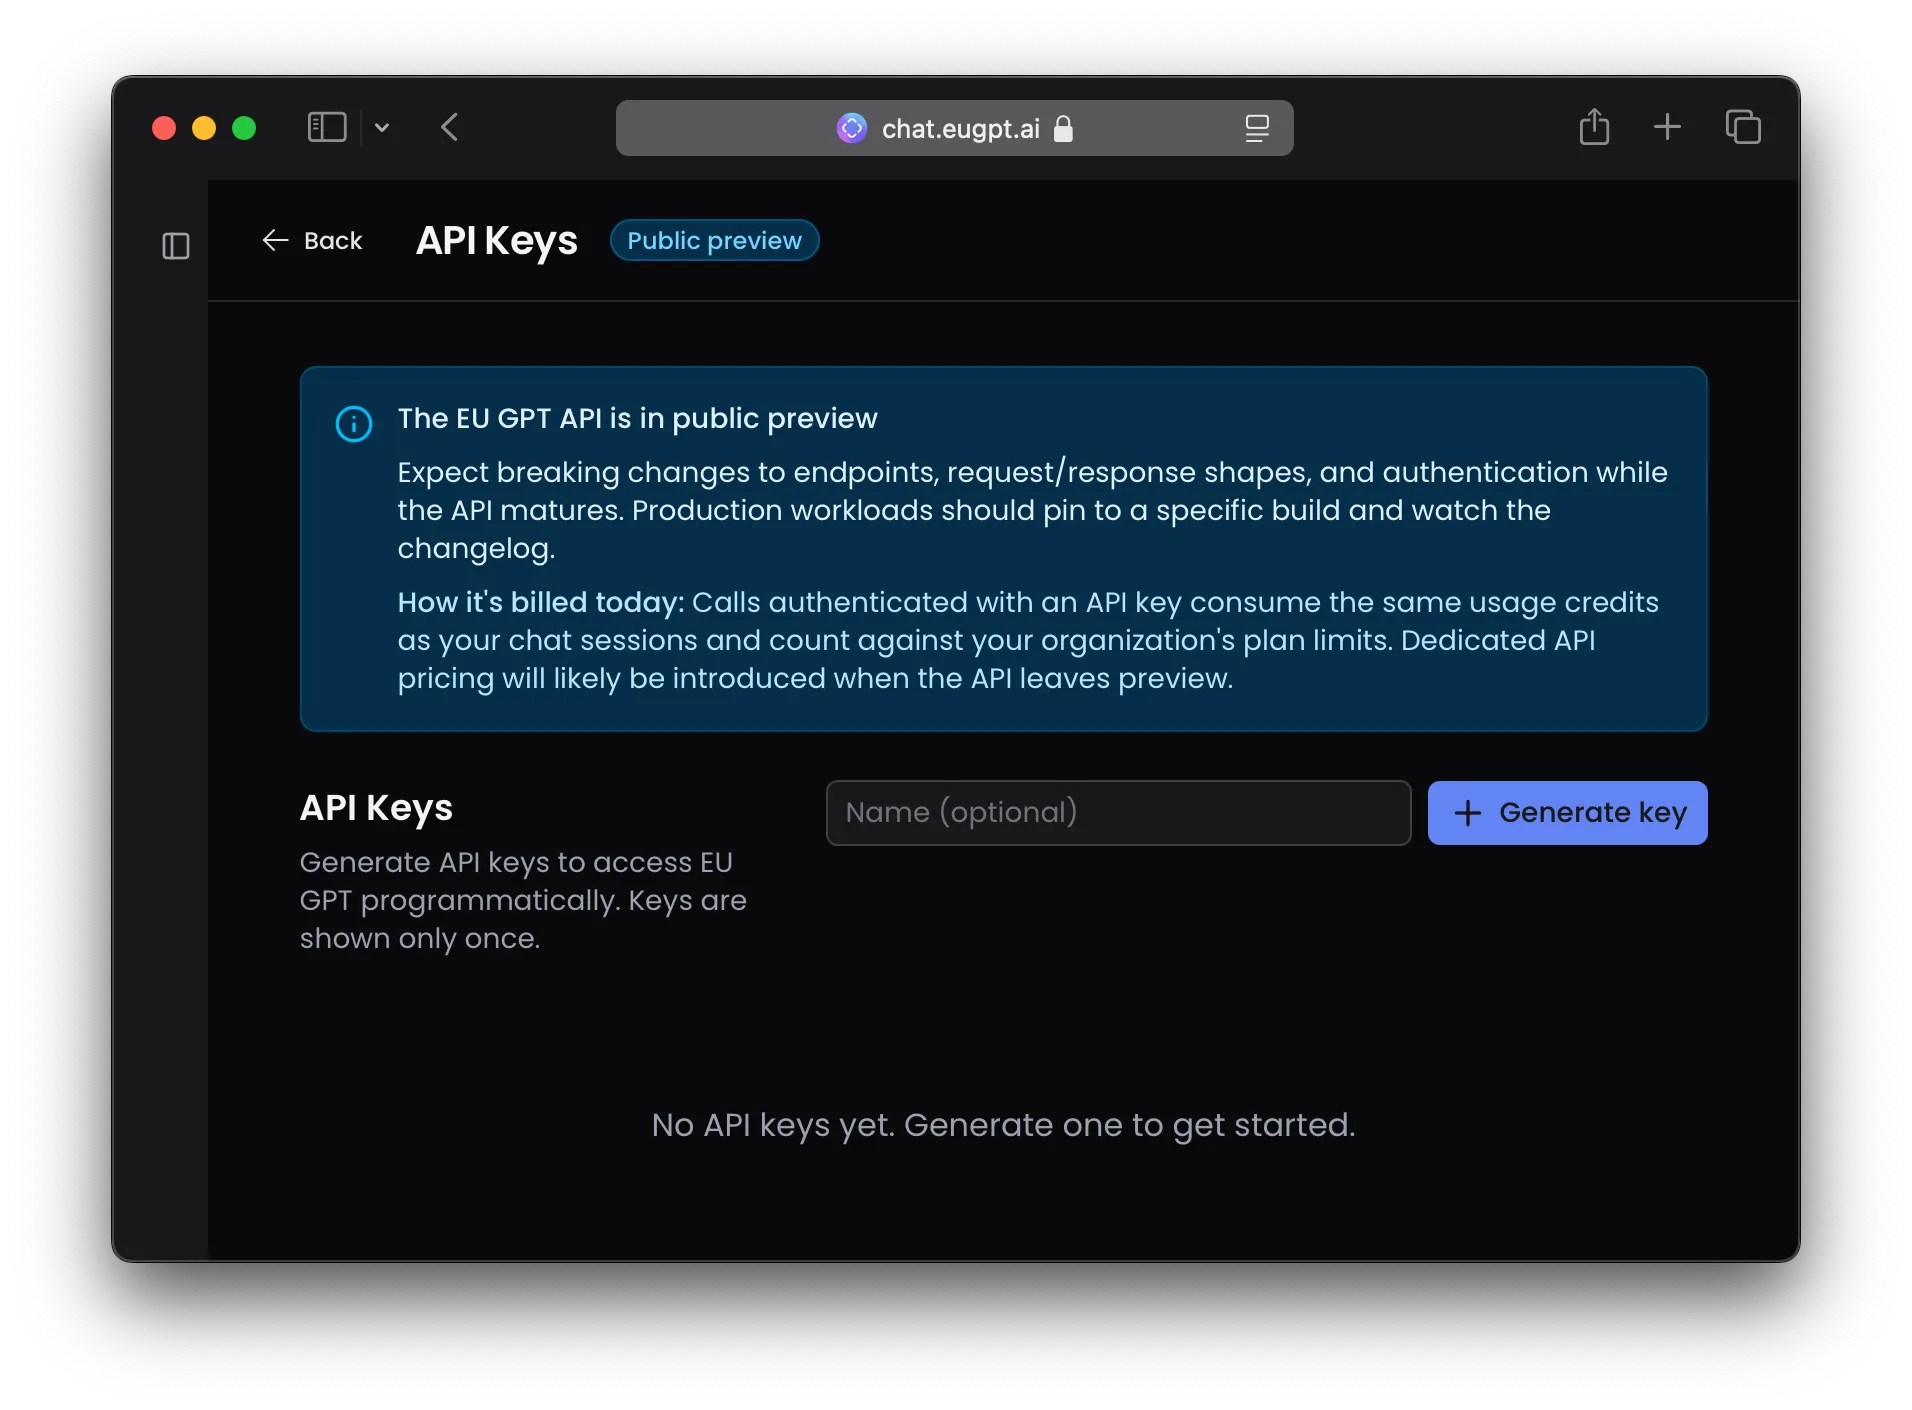
Keys are shown once. Store them in your secrets manager — you cannot retrieve a key after the dialog closes. Revoke and reissue if a key is exposed.
3. Send your first request#
Export the key and call the API. The minimum viable request is one line of input.
export EUGPT_API_KEY="eugpt_..."

curl https://chat.eugpt.ai/v1/responses \
  -H "Authorization: Bearer $EUGPT_API_KEY" \
  -H "Content-Type: application/json" \
  -d '{
    "model": "auto",
    "input": "Write a haiku about sovereignty.",
    "stream": false
  }'
import OpenAI from "openai";
const client = new OpenAI({
apiKey: process.env.EUGPT_API_KEY,
baseURL: "https://chat.eugpt.ai/v1",
});
const response = await client.responses.create({
model: "auto",
input: "Write a haiku about sovereignty.",
stream: false,
});
console.log(response.output_text);from openai import OpenAI
client = OpenAI(
api_key=os.environ["EUGPT_API_KEY"],
base_url="https://chat.eugpt.ai/v1",
)
response = client.responses.create(
model="auto",
input="Write a haiku about sovereignty.",
stream=False,
)
print(response.output_text)A successful response looks like:
{
  "id": "550e8400-e29b-41d4-a716-446655440000",
  "object": "response",
  "created_at": 1716387200000,
  "status": "completed",
  "model": "gpt-oss-120b",
  "output": [ /* ... structured items ... */ ],
  "output_text": "Servers stand in Paris,\nLaws hold every byte at home —\nAnswers, still in light."
}
4. Switch to streaming#
Most real applications stream. Set stream: true (or omit it — true is the default) and read the response as Server-Sent Events.
const stream = await client.responses.create({
  model: "auto",
  input: "Explain GDPR in three sentences.",
  stream: true,
});

for await (const event of stream) {
  if (event.type === "response.output_text.delta") {
    process.stdout.write(event.delta);
  }
}
stream = client.responses.create(
model="auto",
input="Explain GDPR in three sentences.",
stream=True,
)
for event in stream:
if event.type == "response.output_text.delta":
print(event.delta, end="", flush=True)The full set of streaming events — including tool calls, content parts, and completion — is described in Streaming events.
What next#
- Authentication — key lifecycle, rotation, and revocation.
- The Responses API model — how this API differs from chat completions, and what
inputaccepts. - Tool use — how the built-in web search and other tools surface in the response stream.